Chalking, Encapsulation, and Why Paint Sometimes Fails
One of the most misunderstood issues in residential painting is chalking—and it’s also one of the most common reasons paint jobs fail prematurely.
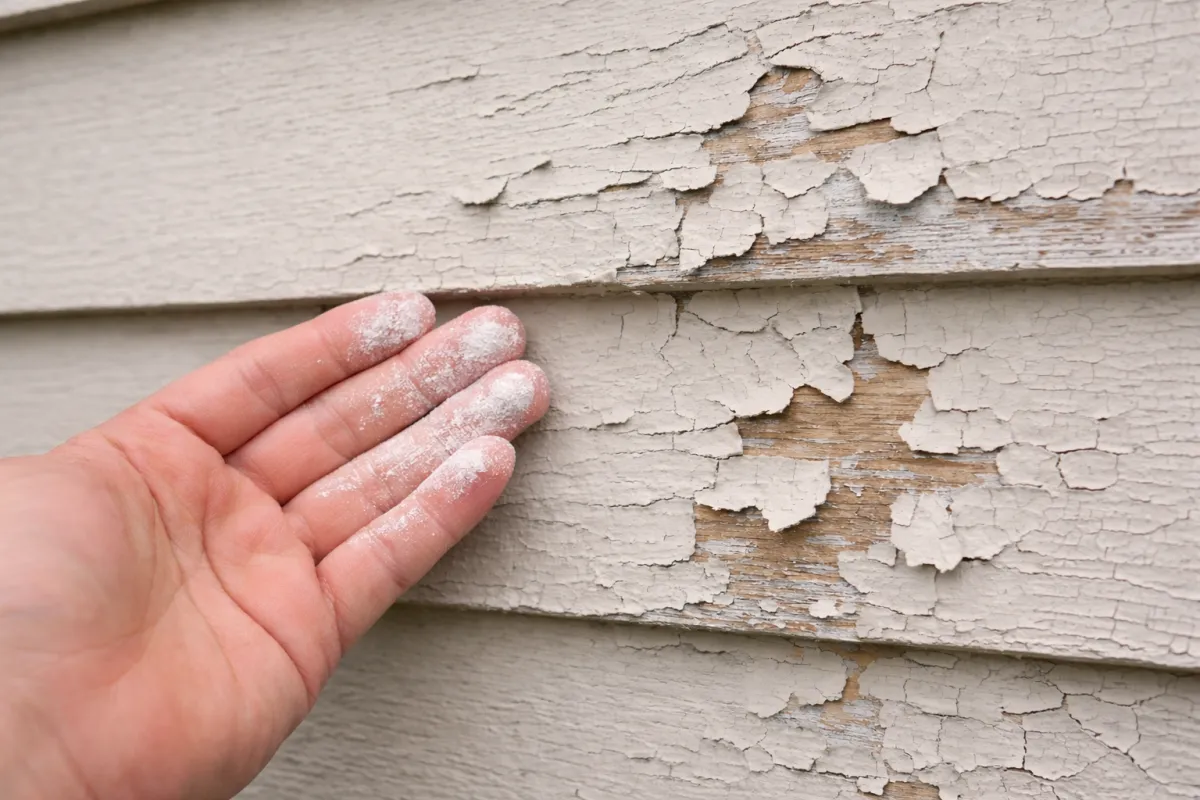
If you’ve ever run your hand along an exterior wall and come away with a dusty residue, you’ve seen chalking firsthand. Understanding what it is, why it happens, and how it relates to encapsulation is essential to getting a paint job that actually lasts.
What Is Chalking?
Chalking occurs when the binder in paint breaks down due to prolonged exposure to sun, heat, and weather. As the binder degrades, pigment particles are released, creating a powdery residue on the surface.
Chalking is common on:
Older paint systems
South- and west-facing walls
Homes exposed to intense UV and coastal conditions
While light chalking is normal over time, excessive chalking is a warning sign that the existing coating may no longer be a stable base for new paint.
Why Chalking Matters Before Repainting
Paint needs a sound, stable surface to adhere properly.
When chalking is present:
New paint may not bond correctly
Adhesion can be compromised even if the surface looks intact
Premature peeling or flaking becomes more likely
Simply applying two fresh coats over chalking without proper preparation is one of the fastest ways to shorten the life of a paint job.
The Role of Encapsulation (Especially on Older Homes)
On homes built before 1978, there may be legacy lead-based paint beneath existing layers. In these cases, contractors often use encapsulation—a specialized coating system designed to seal and contain older paint layers safely.
Encapsulation is not just a primer. It’s a containment strategy.
When encapsulation is:
Intact and stable → it can often be painted over like a normal surface
Chalking, cracking, or failing → it must be stabilized or reapplied in affected areas
Encapsulation should never be treated as a “forever layer” that’s blindly painted over without inspection.
Does Chalking Always Mean Re-Encapsulation?
No—but it does require action.
Light chalking may be resolved with thorough washing and a binding primer
Heavy or persistent chalking indicates surface breakdown and may require spot encapsulation or full stabilization
Ignoring chalking almost always leads to adhesion failure
The correct approach depends on how the surface responds after proper cleaning.
Why Preparation Is Not Optional
Professional painting isn’t about how many coats go on—it’s about what the paint is going onto.
A quality preparation process may include:
Washing to remove chalk and contaminants
Surface testing after cleaning
Binding primers where adhesion is questionable
Spot encapsulation where integrity is compromised
Skipping these steps to save time or money usually costs more in the long run.
The Honest Truth About “Two Coats Only”
Some homeowners request “just two coats, no primer.” While this can be appropriate on stable surfaces, it’s not always compatible with chalking or degraded coatings.
When preparation steps are declined against professional recommendations:
The scope must be limited
Performance expectations must be adjusted
Adhesion warranties may not apply
A reputable contractor will explain these realities upfront—not after the paint fails.
Final Thoughts
Chalking and encapsulation aren’t buzzwords—they’re indicators of how a surface is aging and what it needs to perform properly again.
A durable paint job comes from:
Understanding the existing coating system
Respecting surface conditions
Applying the right preparation—not just more paint
At Placidity, our goal is simple: do it once, do it right, and do it transparently.
If you’re planning a repaint and want to understand what your home actually needs, we’re always happy to walk you through it.
